Understanding Fibers
Fibers are the building blocks of every Oeave experience. Learn what they are, which types exist, and how to use them to tell a complete product story.
Every piece of content in Oeave is called a Fiber. A product photo is a Fiber. A customer testimonial is a Fiber. A technical specification, a how-it-works explanation, a pricing table — each one is a Fiber.
Fibers are the raw material your Weave is built from. The richer and more varied your Fibers are, the deeper your buyers can explore your product.
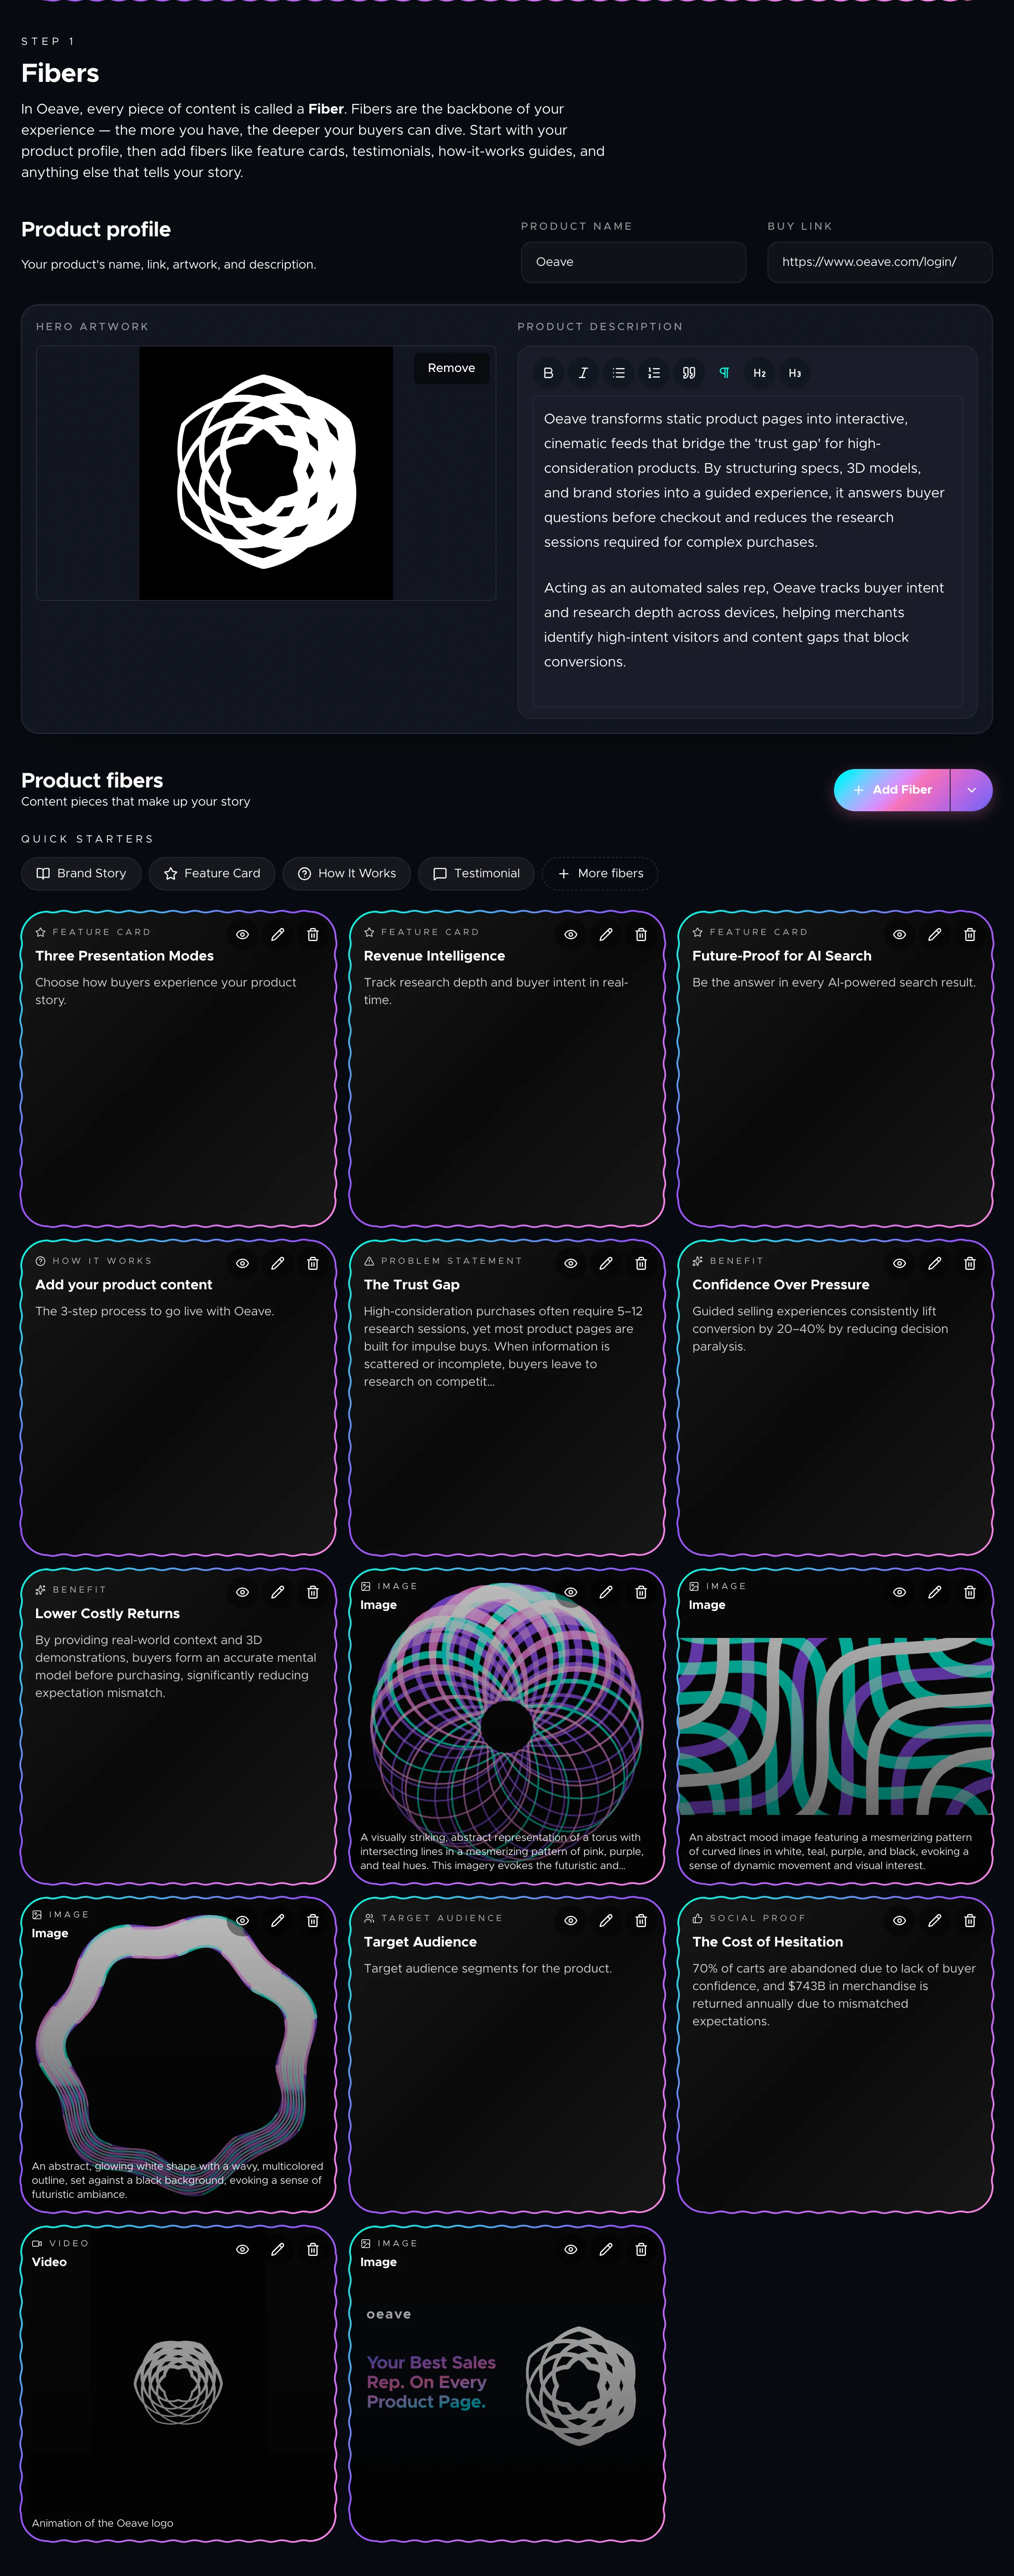
The product profile
Before adding individual Fibers, fill in your product profile at the top of the Fibers tab. This includes:
- Product name — what your product is called.
- Buy link — where the buyer goes to purchase.
- Hero artwork — the main image representing your product.
- Product description — a rich text overview of what your product does and why it matters.
The product profile anchors every experience and provides the context that ties your Fibers together.
Fiber types
Oeave supports 30 fiber types. Each one captures a specific kind of product information. Here are the main categories:
Visual content
- Image — a photo or graphic that shows the product clearly: front view, close-up, lifestyle shot. Oeave automatically generates a text description so the image appears at the right moment.
- 3D Model — a GLB file the buyer can spin and zoom. Useful for products where shape and proportion matter.
- Demo — a short walkthrough or video showing the product in action.
Product story
- Brand Story — a short narrative about why the brand exists. "We started after we could not find a safe toy for our kids."
- Design Philosophy — the ideas that shaped the product. "Keep it simple. Make it strong."
- Core Values — the values the brand stands for. "Care for people. Less waste."
- Behind The Scenes — workshop photos, maker notes, or a look at how the product is made.
- Timeline — dates that show the story of the product or brand.
Features and specifications
- Feature Card — a single feature explained in a short block. "Water safe" or "Fast chip for smooth use."
- Technical Specification — hard data like size, weight, speed, material, and power consumption.
- How It Works — the steps or flow of how the product works. "Place it. Press start. Let it run."
- Setup Guide — simple steps to get started with the product.
- Comparison — how this product differs from alternatives. "Lighter than X. More storage than Y."
Social proof
- Testimonial — a quote from a real customer. "This bag saved my trip."
- Case Study — a small story from a user with clear results. "How a bakery cut waste by 20 percent using our sensor."
- Press Mention — a quote or highlight from media. "Named Best Pick by Tech Weekly."
- Social Proof — ratings or signals that many people trust the product. "10,000 happy users. Rated 4.8."
Buyer support
- FAQ — key questions and answers buyers commonly ask.
- Pricing — the price and what is included. "$199 for the base kit. Extra battery $29."
- Guarantee — what the buyer gets if things go wrong. "30-day free return. Two-year cover."
- Availability — stock or delivery notes. "Ships in 2 days. Few left in blue."
- Contact Info — ways to reach support or the seller.
- Legal — safety rules, age limits, warnings.
Audience and use
- Target Audience — who the product is made for. "Great for small teams and solo makers."
- Use Case — clear ways people use the product. "Great for school work or home design."
- Problem Statement — the problem the product solves. "Most bags break fast. Ours does not."
- Benefit Card — short points that show value. "Saves time" or "Cuts your cost."
Extras
- Bundle — groups of items sold together. "Starter kit with two bottles and a tray."
- Resource — files or links that help the buyer: size guide, style guide, demo pack.
- Roadmap — what is coming next. "New colors in summer. App update in fall."
Adding Fibers
There are several ways to add Fibers to your project. For a deeper look at all import methods, see Importing Content.
Manual creation
Click Add Fiber on the Fibers tab. Choose a fiber type from the catalog, fill in the fields, and save. The quick starters at the top give you one-click access to the most common types.
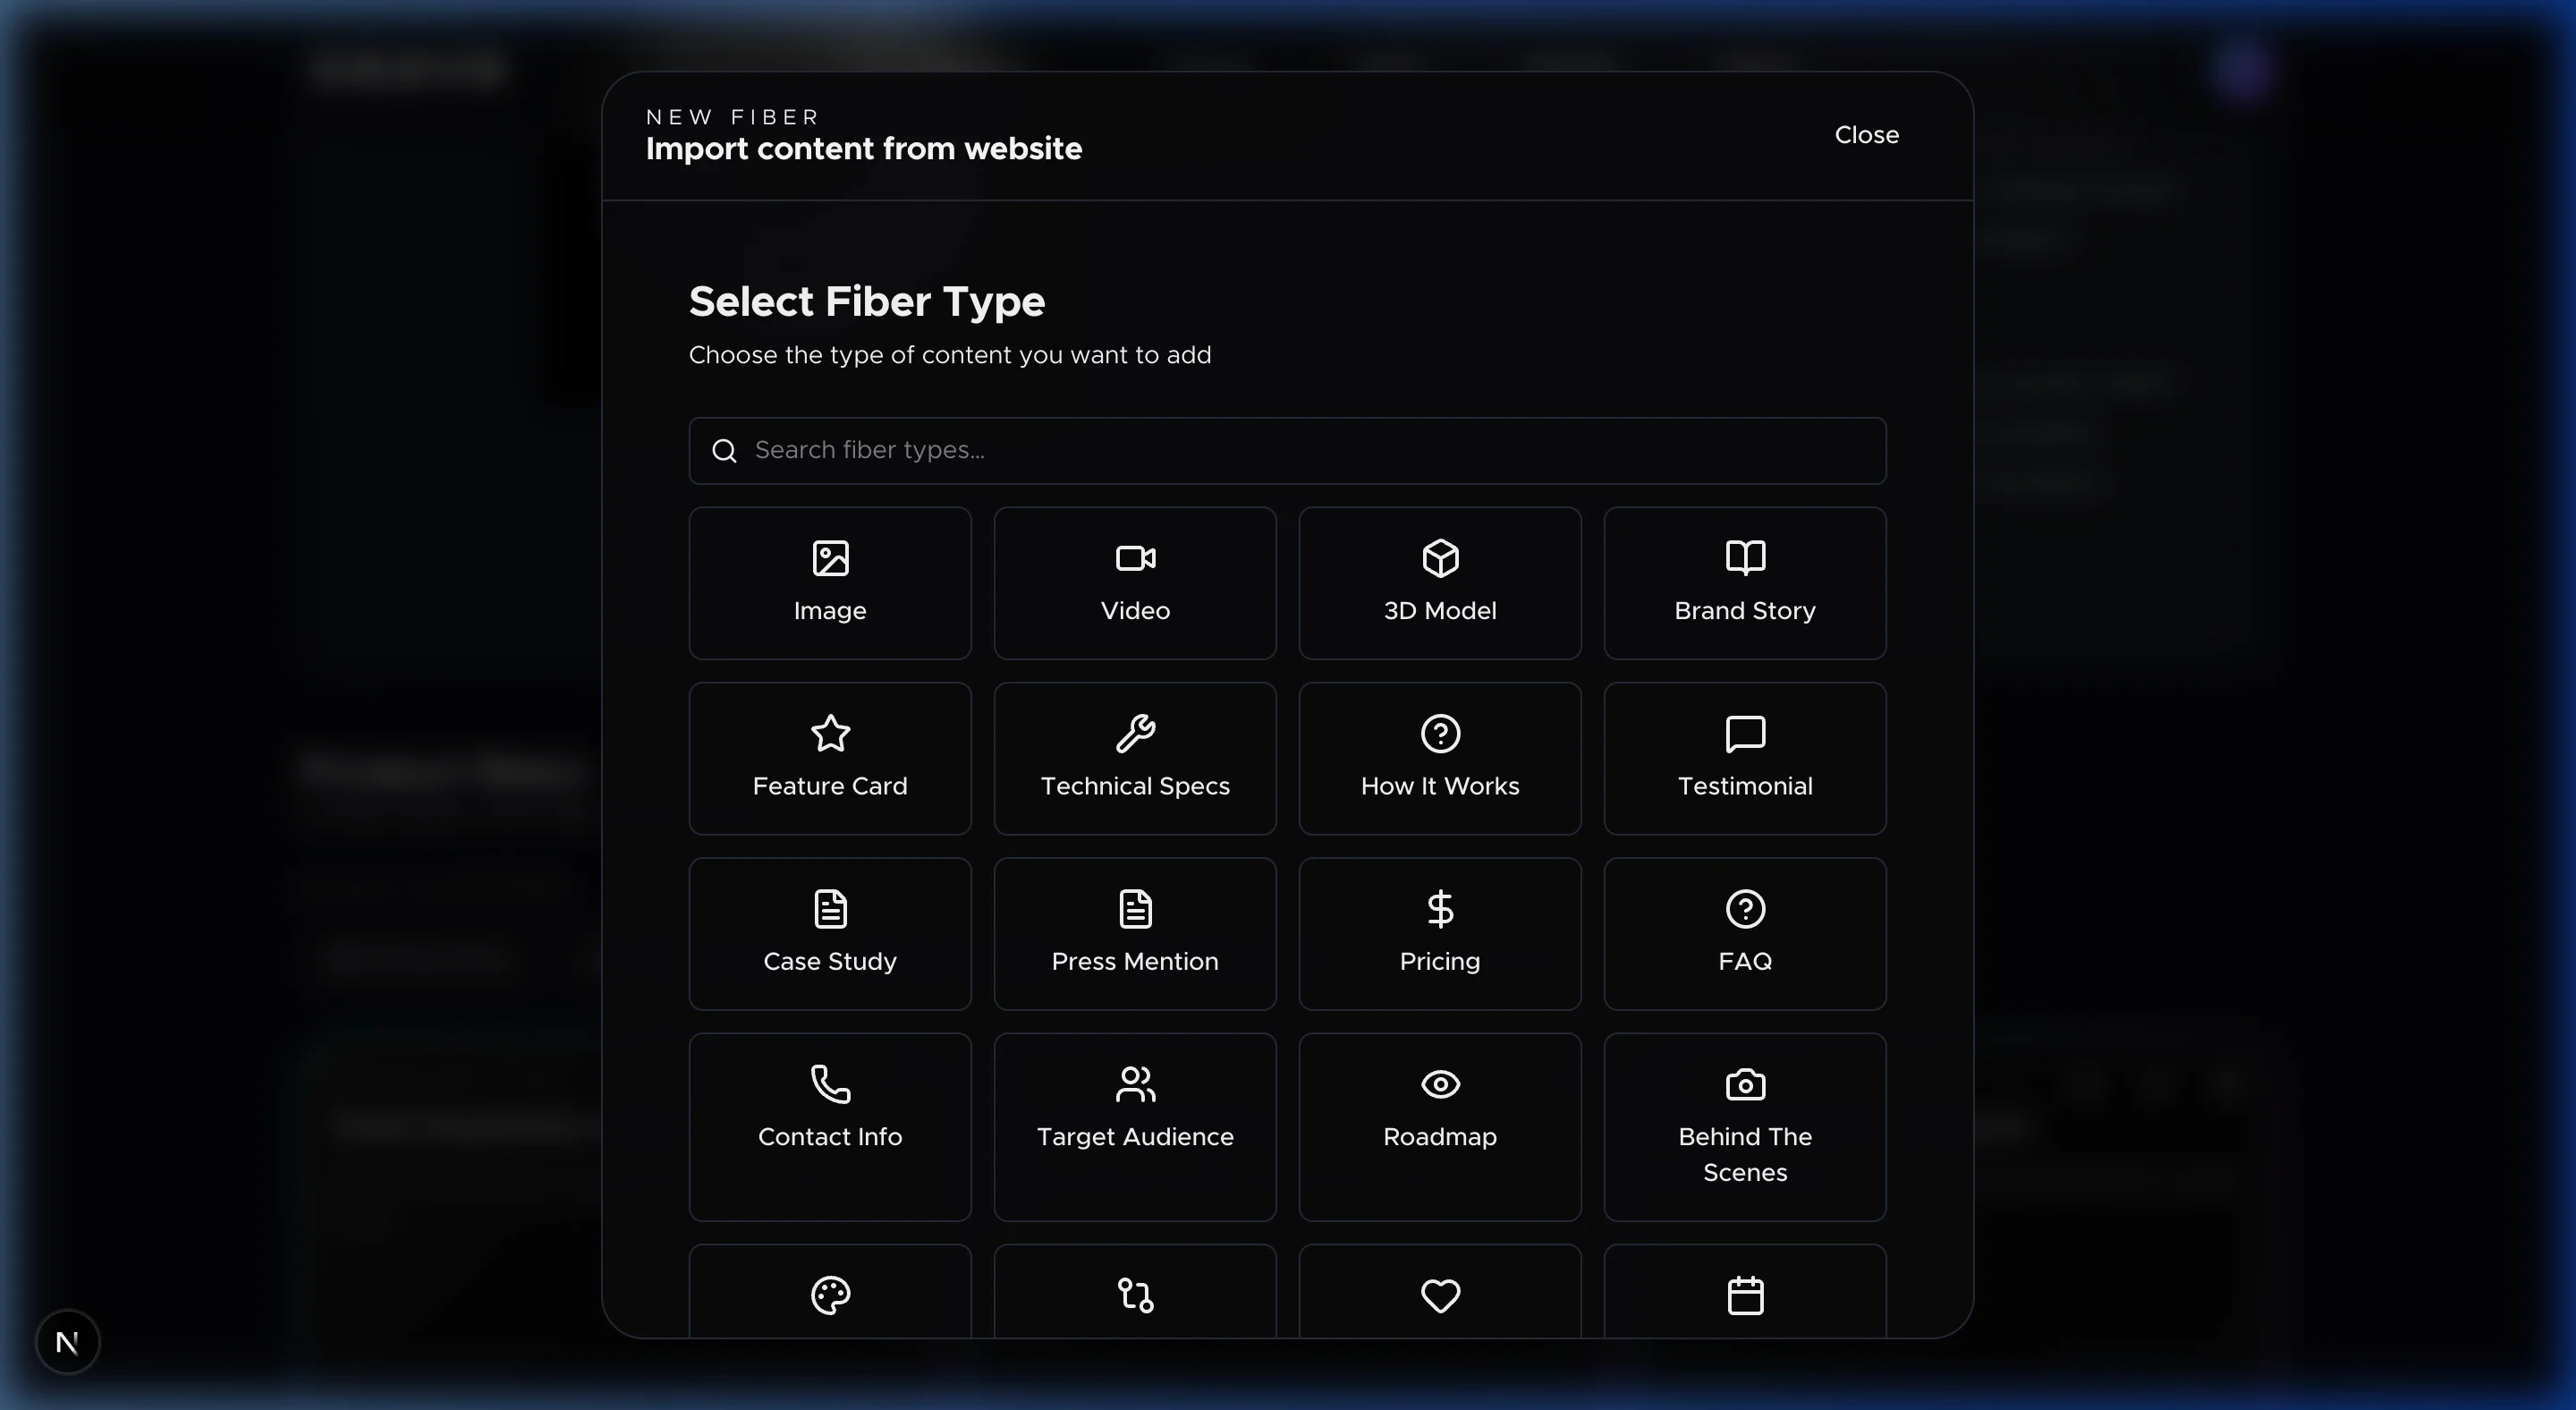
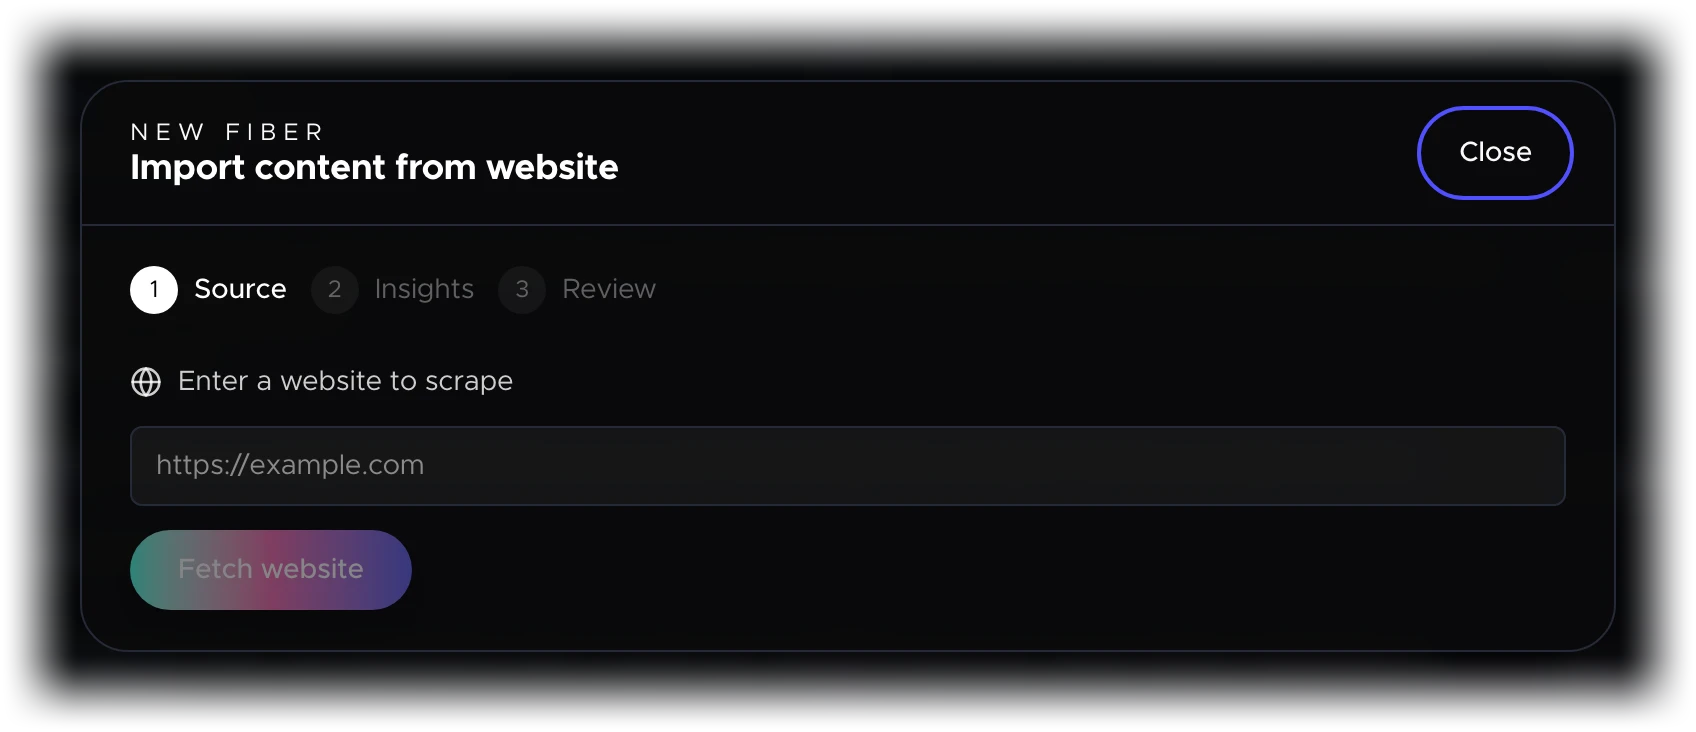
Import from website
Click the dropdown arrow next to "Add Fiber" and select Add from website. Paste a product page URL and Oeave will extract text, images, and structure automatically, converting them into individual Fibers.
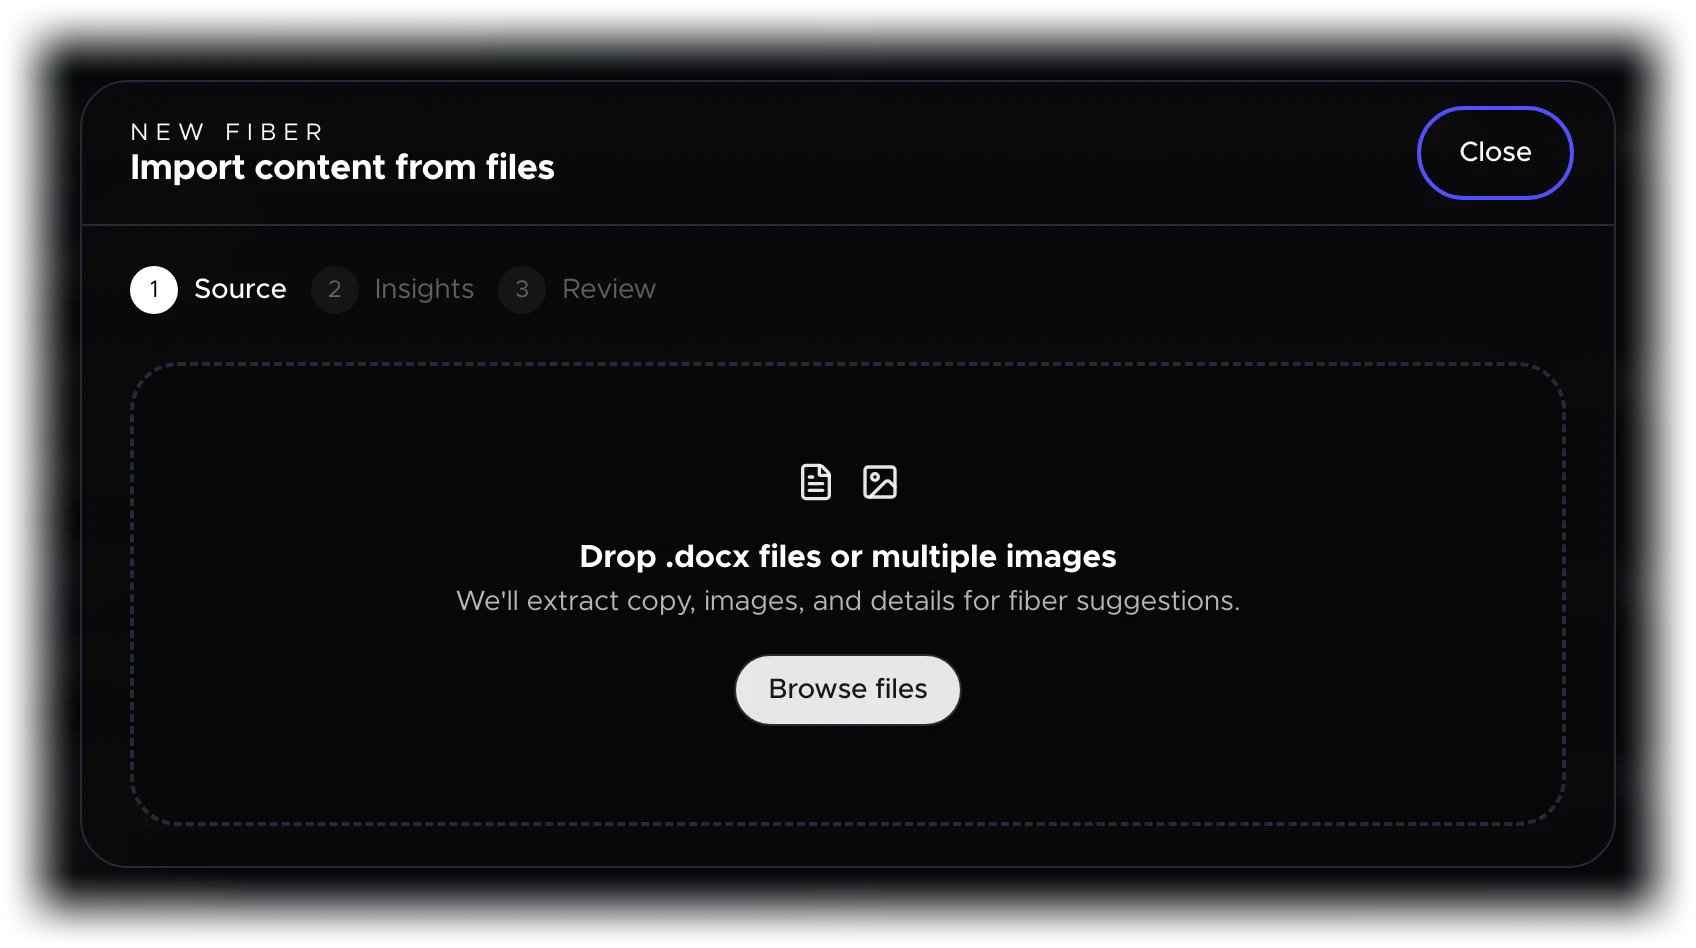
Import from files
Select Add from files to upload a Word document (.docx) or drag-and-drop images in bulk. Documents are parsed into individual Fibers. Images get auto-generated text descriptions.
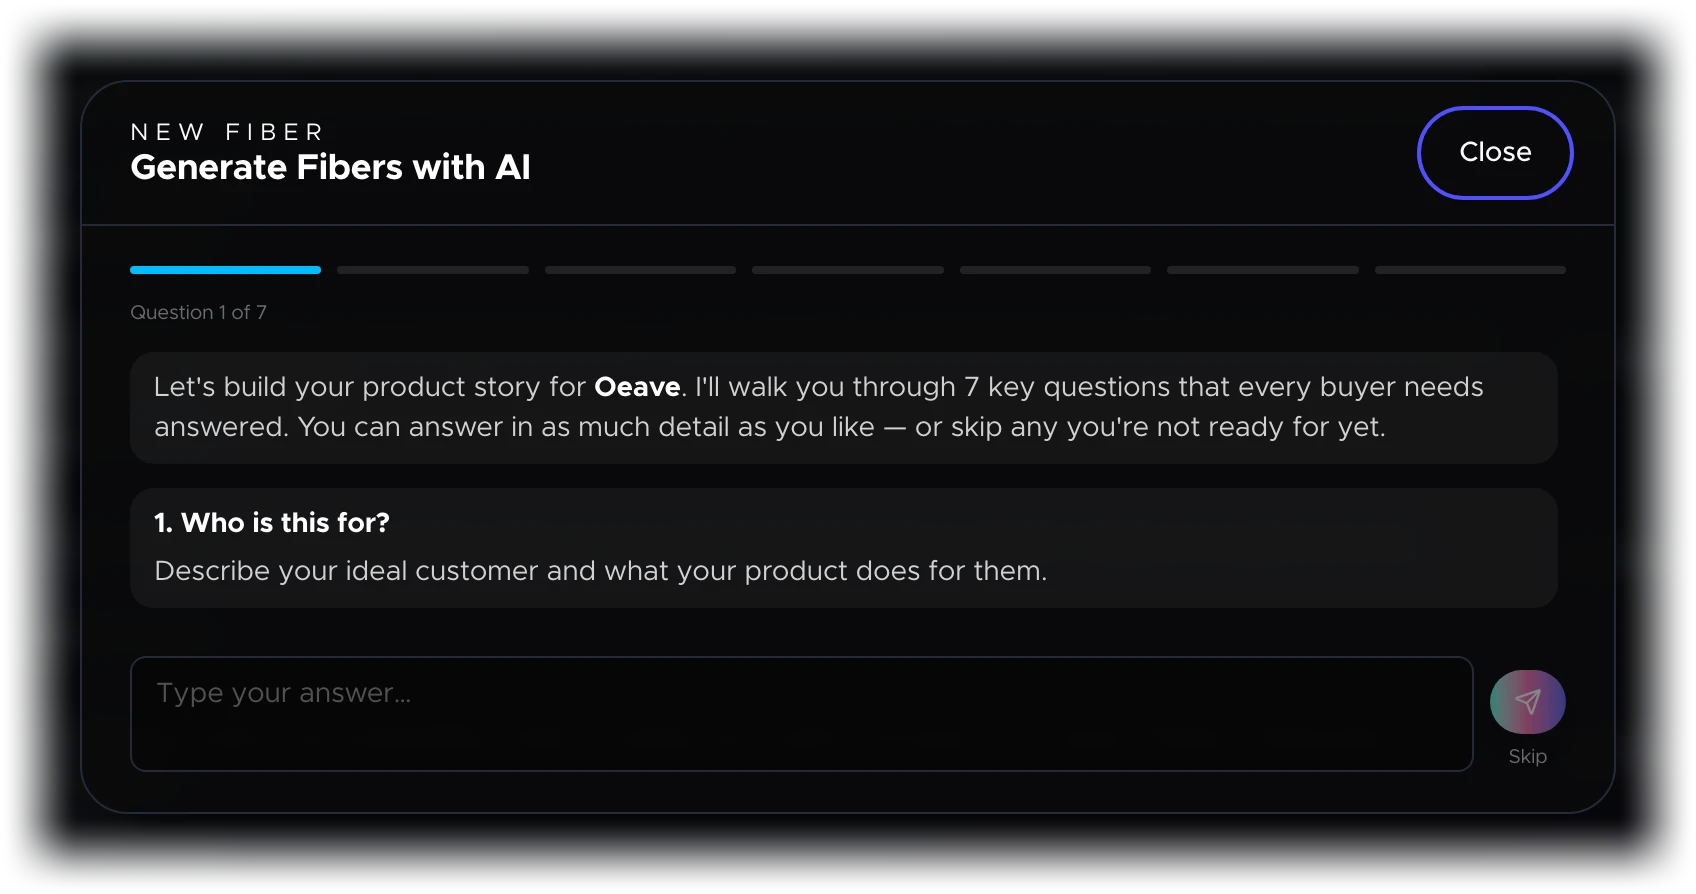
AI generation
Select Add with AI to open a guided flow where you answer questions about your product. Oeave generates Fibers based on your answers — a fast way to bootstrap your content library.
Editing and managing Fibers
Each Fiber appears as a card on the Fibers tab. Click a card to edit its content. You can update text, swap images, or change the fiber type. Deleting a Fiber removes it from the project, but you can undo the action immediately if needed.
Changes to Fibers save automatically. If a Fiber is already attached to a Thread, updating the Fiber updates the Thread content the next time you publish.
Next steps
- Importing Content — bring in content from websites, files, or AI
- Building Threads — arrange Fibers into guided buyer experiences
- Component Reference — all 16 component types that display your Fibers
- Media and Assets — manage images, videos, and 3D models