Getting Started with Oeave
A walkthrough of Oeave's core workflow — from creating your first project to publishing an interactive product experience on your site.
Oeave turns your existing product content into interactive, cinematic buying experiences. Instead of building a long product page and hoping buyers scroll through it, you give them a story they can explore on their own terms.
This guide walks through the entire workflow from start to finish.
What you are building
The end result is a Weave — an embeddable experience that lives on your product page. Buyers interact with it the way they would a short video or a social feed, swiping through slides of your content while guided prompts help them find exactly what they need.
A Weave is made of two things: Fibers (individual content pieces like images, feature cards, and testimonials) and Threads (curated arrangements of those Fibers into topic-based experiences). To learn more about these building blocks, see Understanding Fibers.
The workflow is three steps: add your Fibers, build your Threads, and publish your Weave.
Creating a project
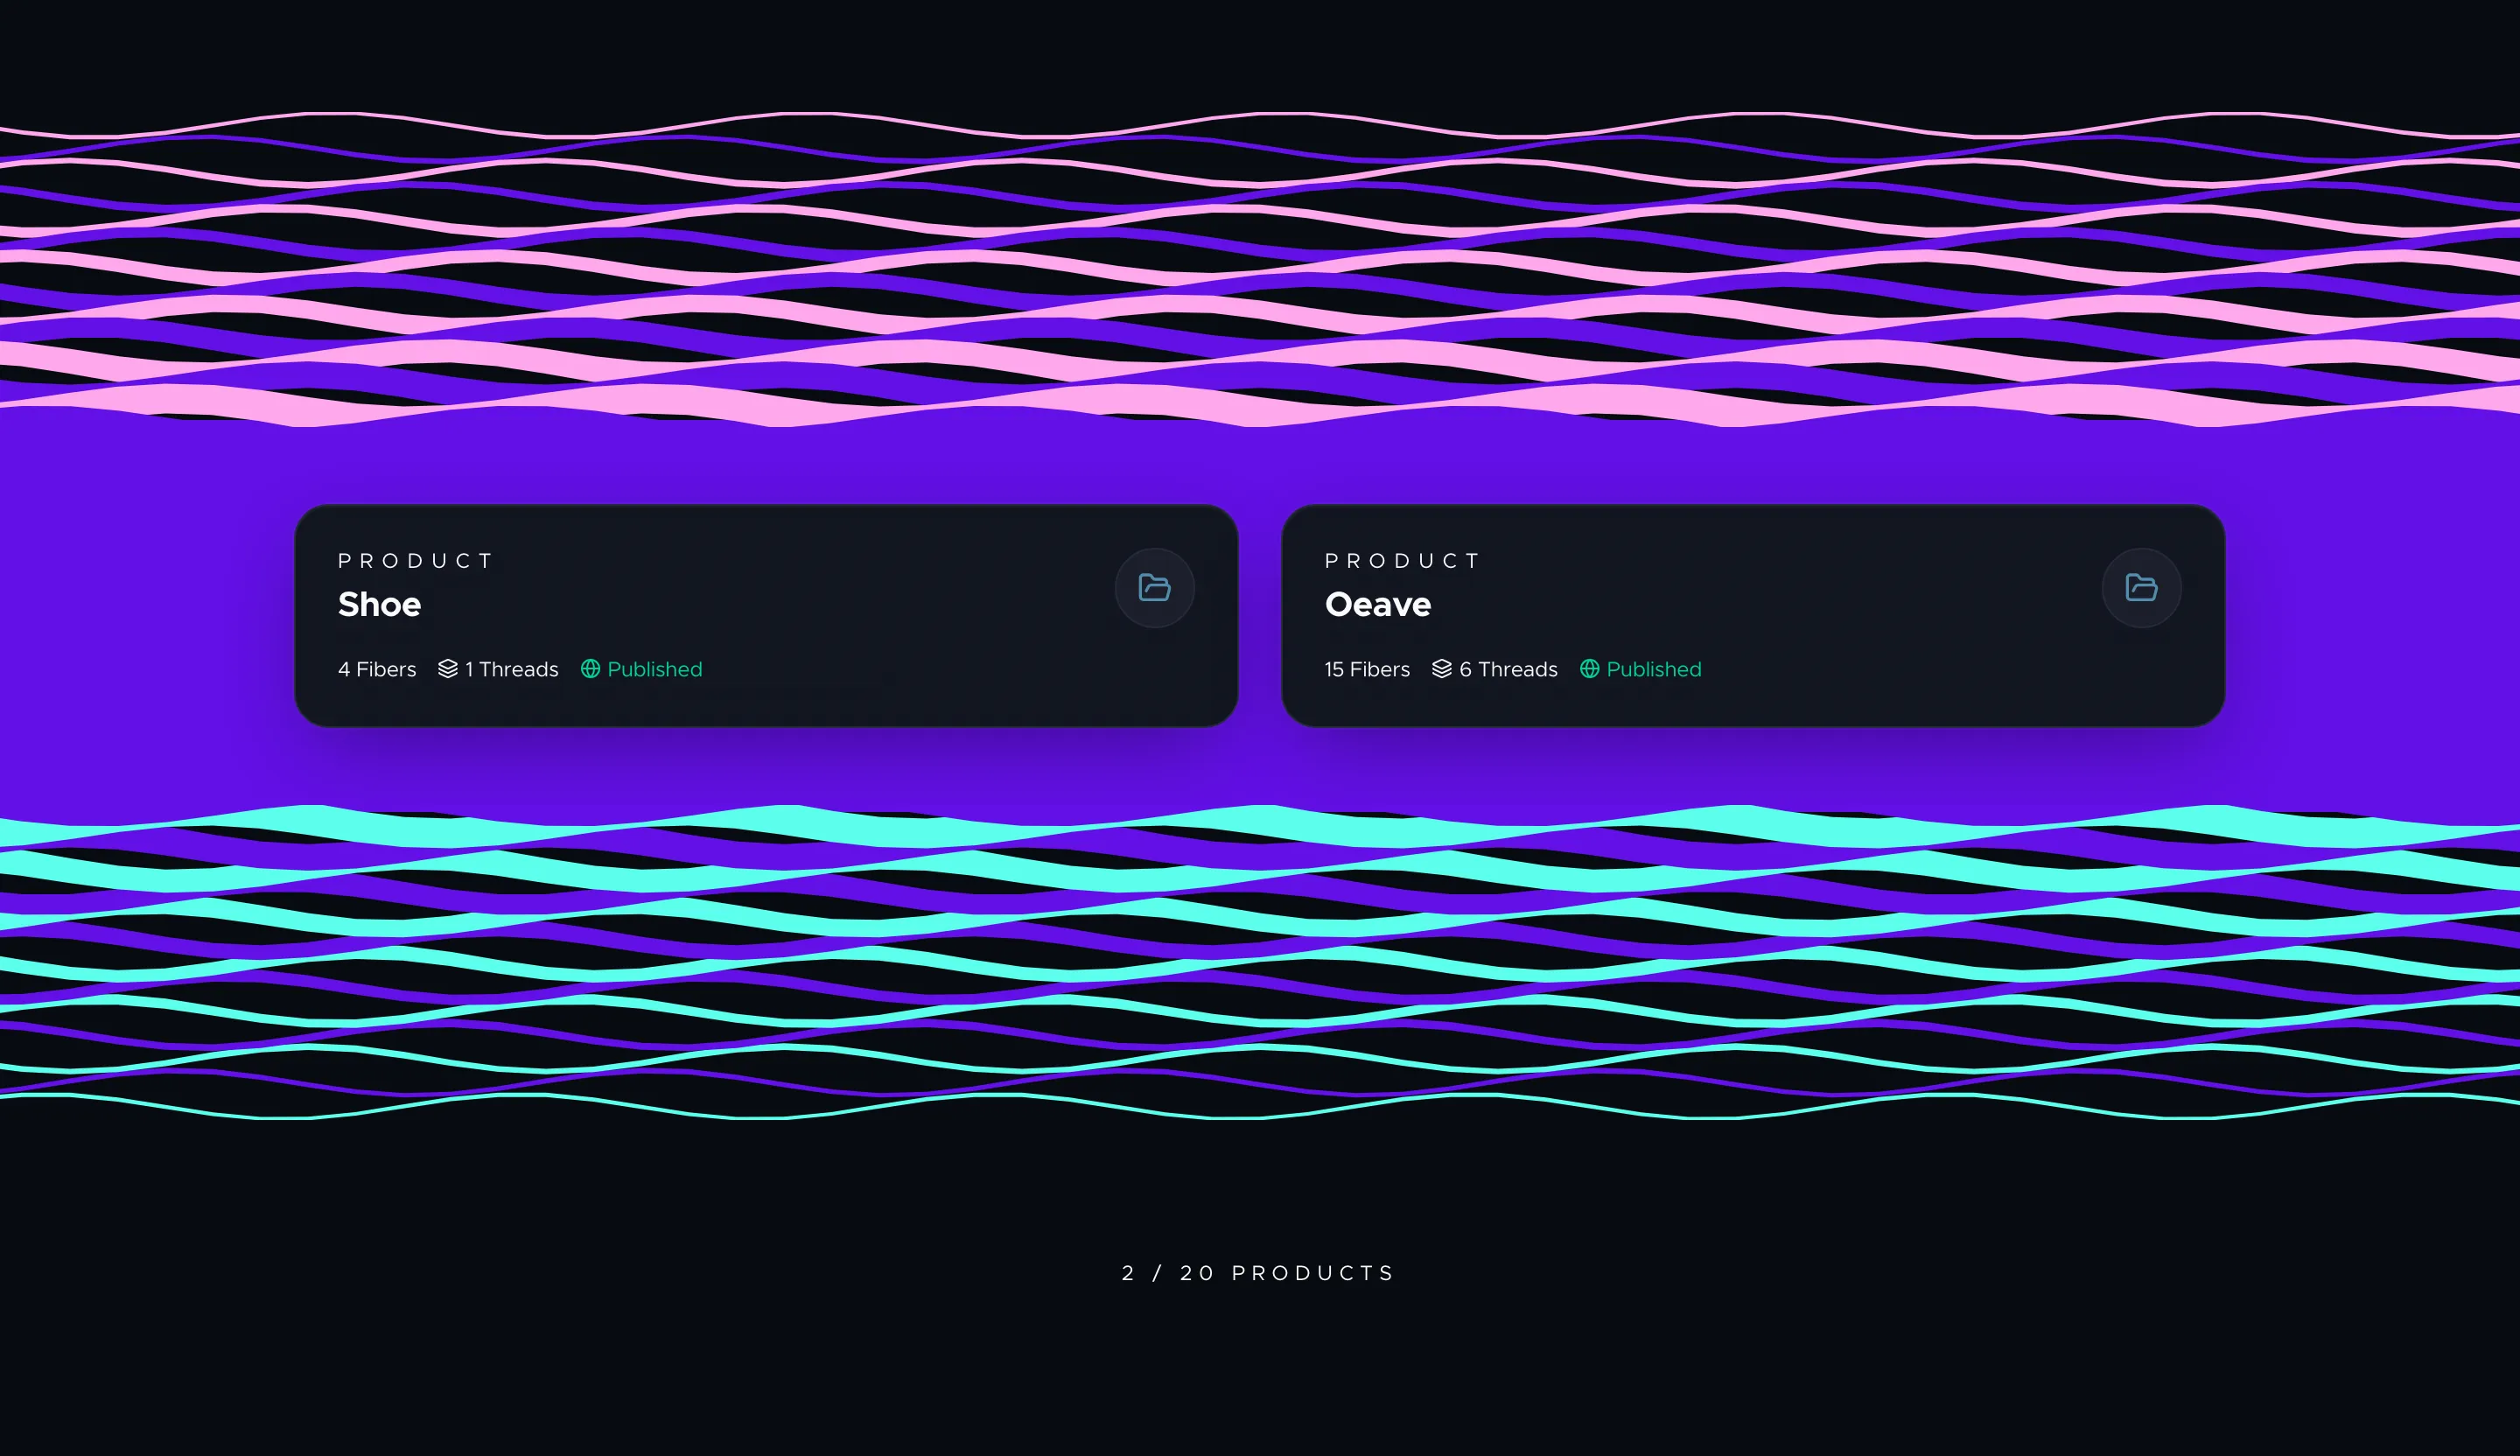
After logging in, the dashboard shows your workspace. Click New project and enter a name — this can be your product name or something internal. The project is your workspace for one product experience.
Once inside the project, you'll see three primary tabs at the top: Fibers, Threads, and Publish Weave. These map directly to the three-step workflow.
Step 1 — Add Fibers
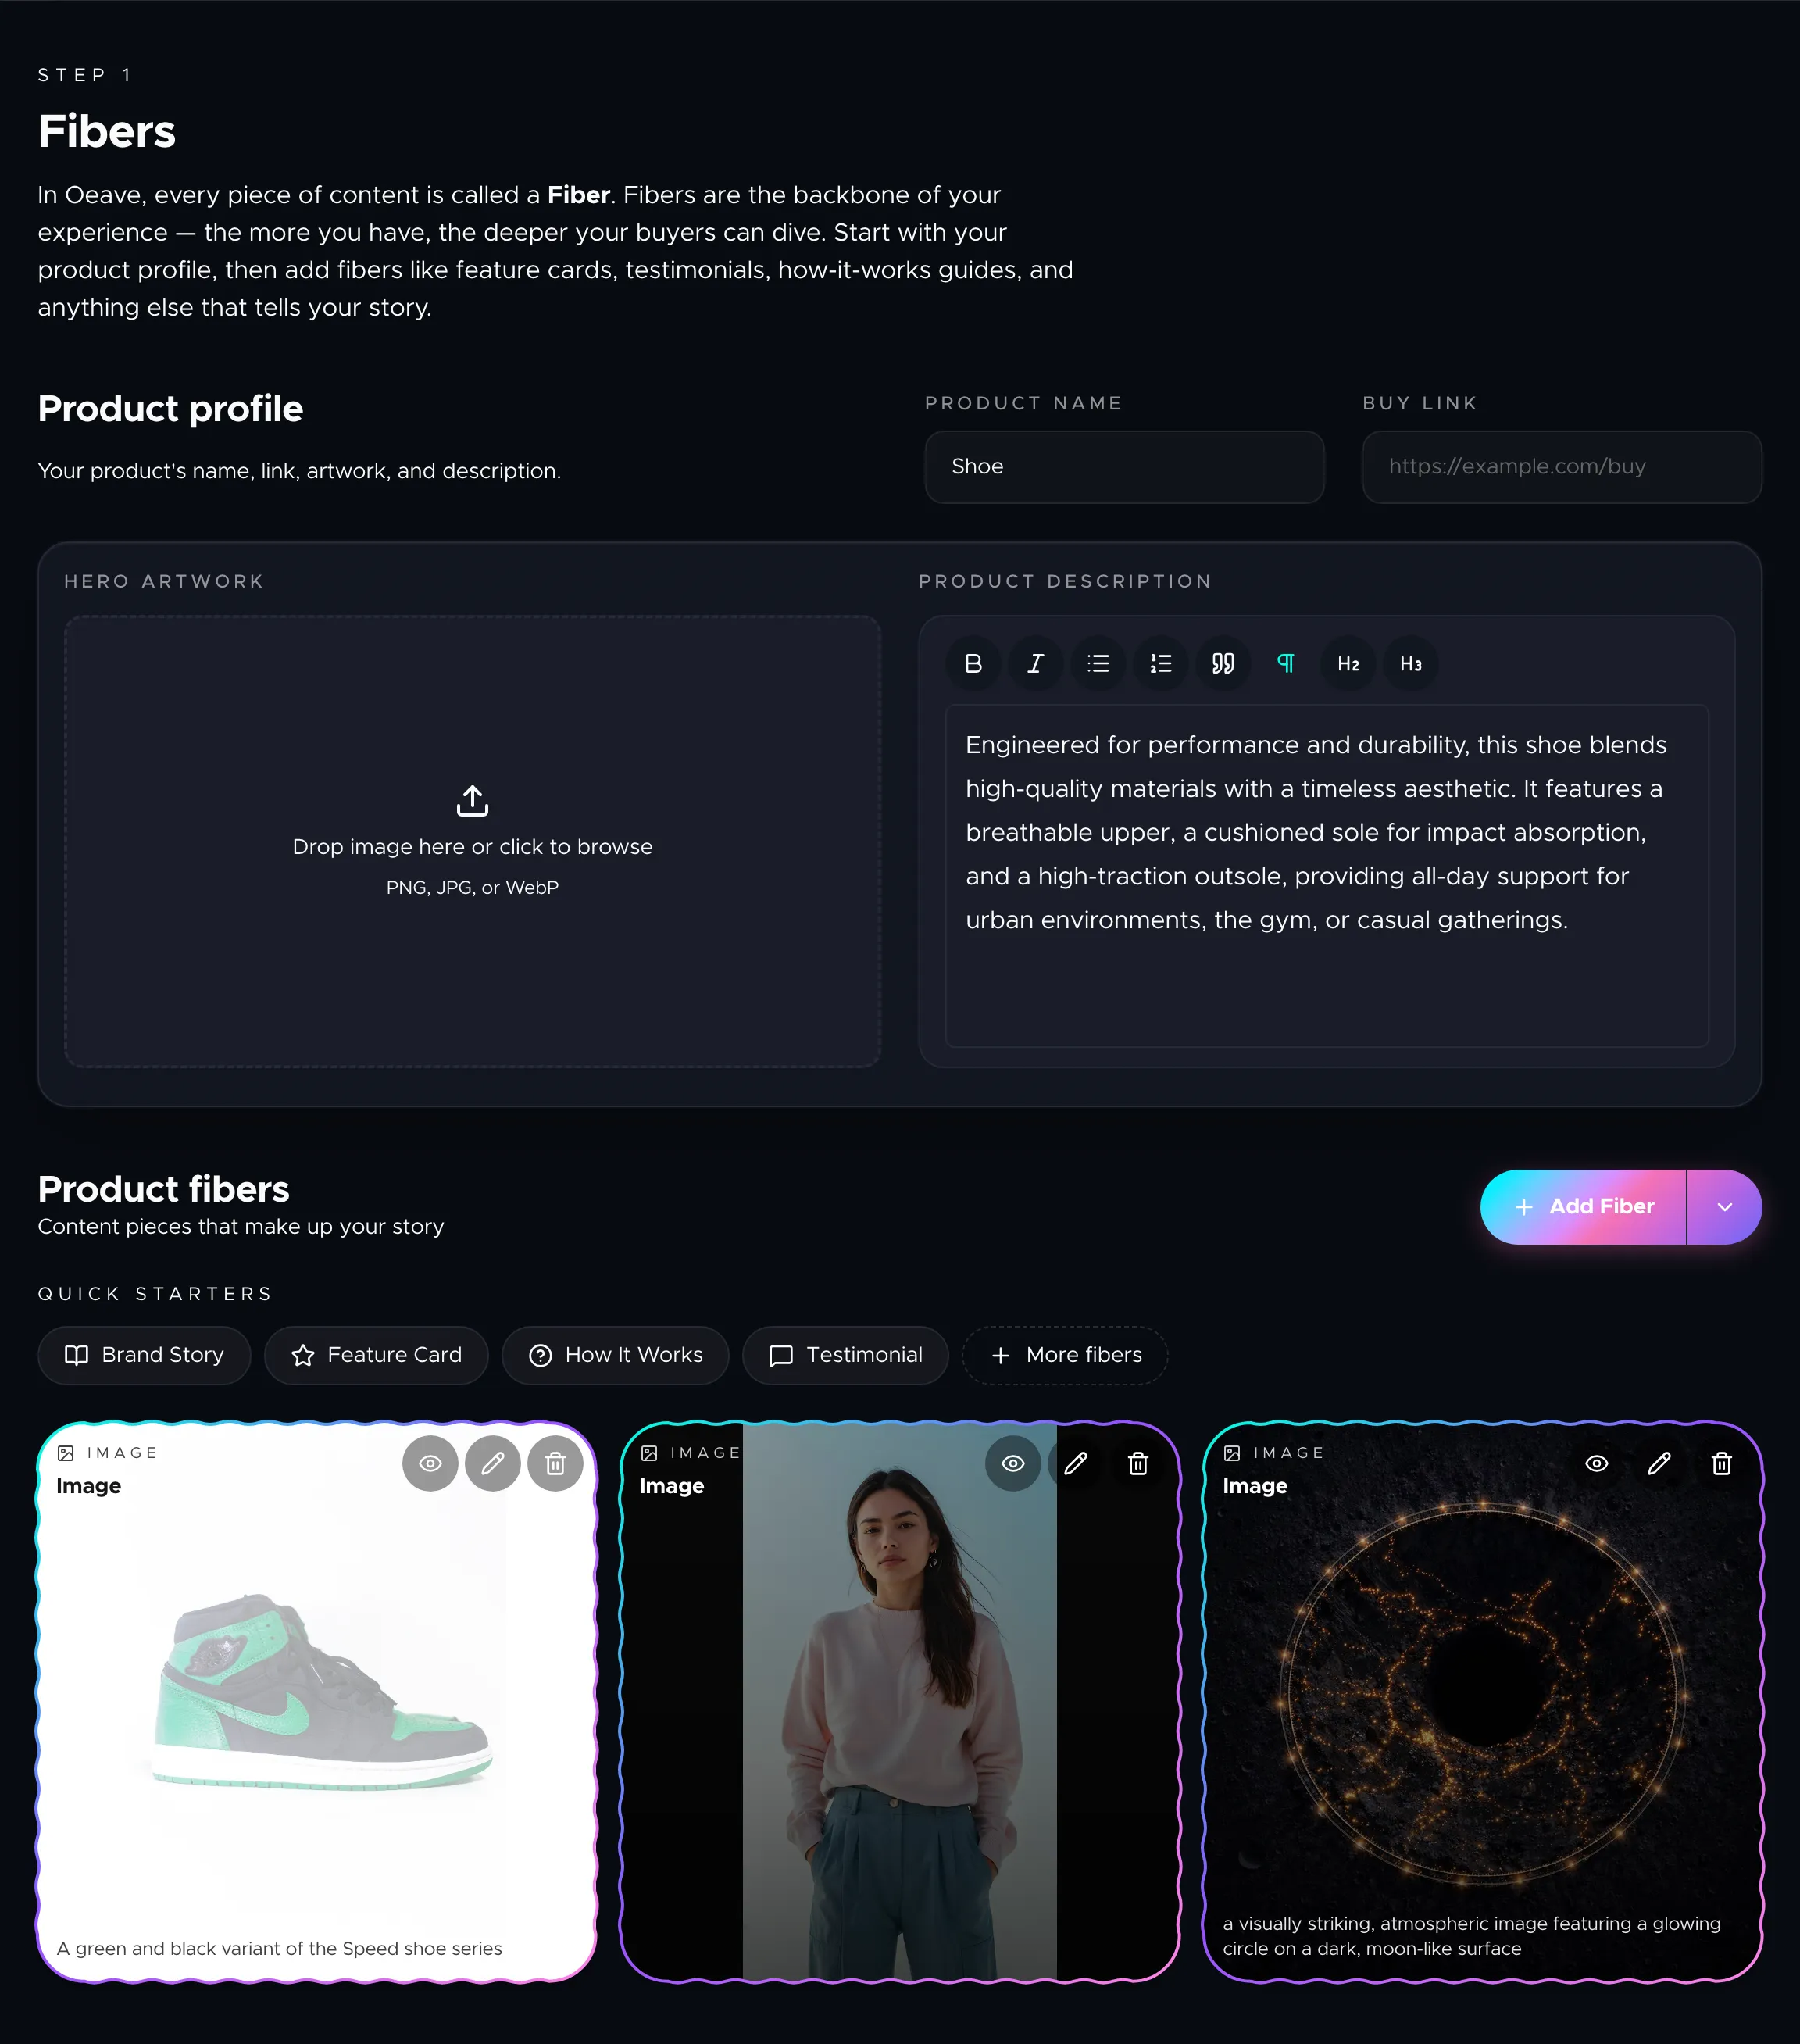
The Fibers tab is where you load all your product content. Start with the product profile at the top — your product's name, buy link, hero image, and description. This anchors everything.
Below the profile, you'll find quick starters for common fiber types: feature cards, testimonials, FAQs, and more. Click Add Fiber to open the full catalog of fiber types, or use one of the import options:
- Add from website — paste a URL and Oeave extracts text, images, and structure automatically.
- Add from files — upload a .docx or drag-and-drop images in bulk.
- Add with AI — describe your product in a chat and let Oeave generate fibers for you.
The more fibers you add, the richer your buyers' experience will be. There is no penalty for adding too many — the system uses them intelligently.
For a deep dive into all fiber types, see Understanding Fibers. To learn about bulk content import options, see Importing Content. For managing uploaded images and videos, see Media and Assets.
Step 2 — Build Threads
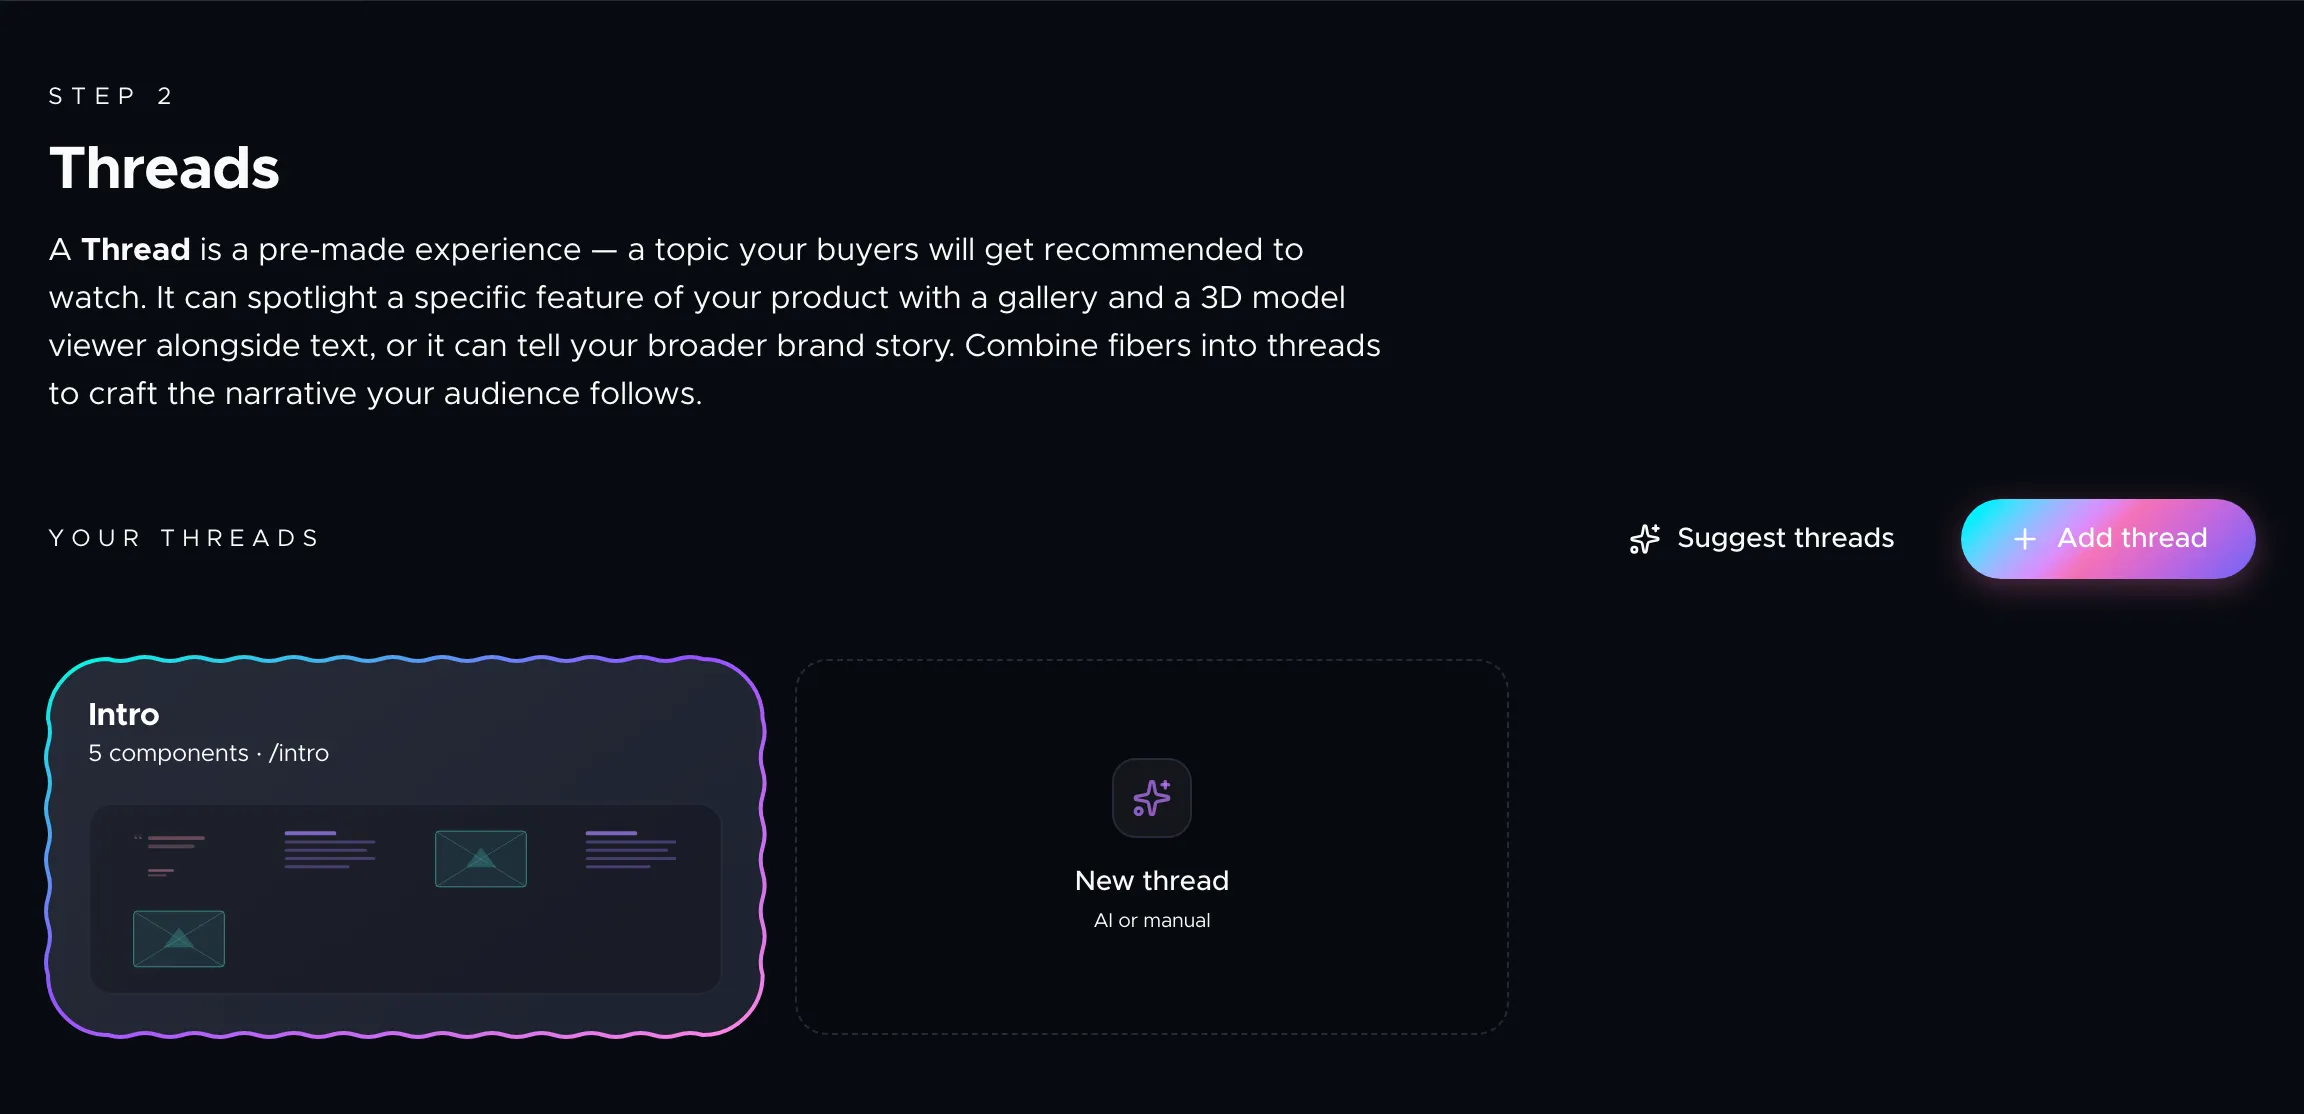
Switch to the Threads tab to organize your fibers into topic-based experiences. A Thread is like a page chapter: "Features", "Design Philosophy", "What Customers Say", or "How It Works".
If you've already added fibers, click Suggest threads and Oeave will analyze your content and propose threads that cover every stage of the buyer journey, from awareness to conversion. You pick which ones to create.
You can also build threads manually using the thread builder. Each thread has a title, a set of components (like a carousel, text block, or quote), and fiber assignments. Attach fibers to each component and the content fills in automatically.
For more on thread construction, see Building Threads. For a reference of every component you can add to a thread, see Component Reference. To add animated backgrounds and depth effects to your components, see Background Graphics.
Step 3 — Publish Weave
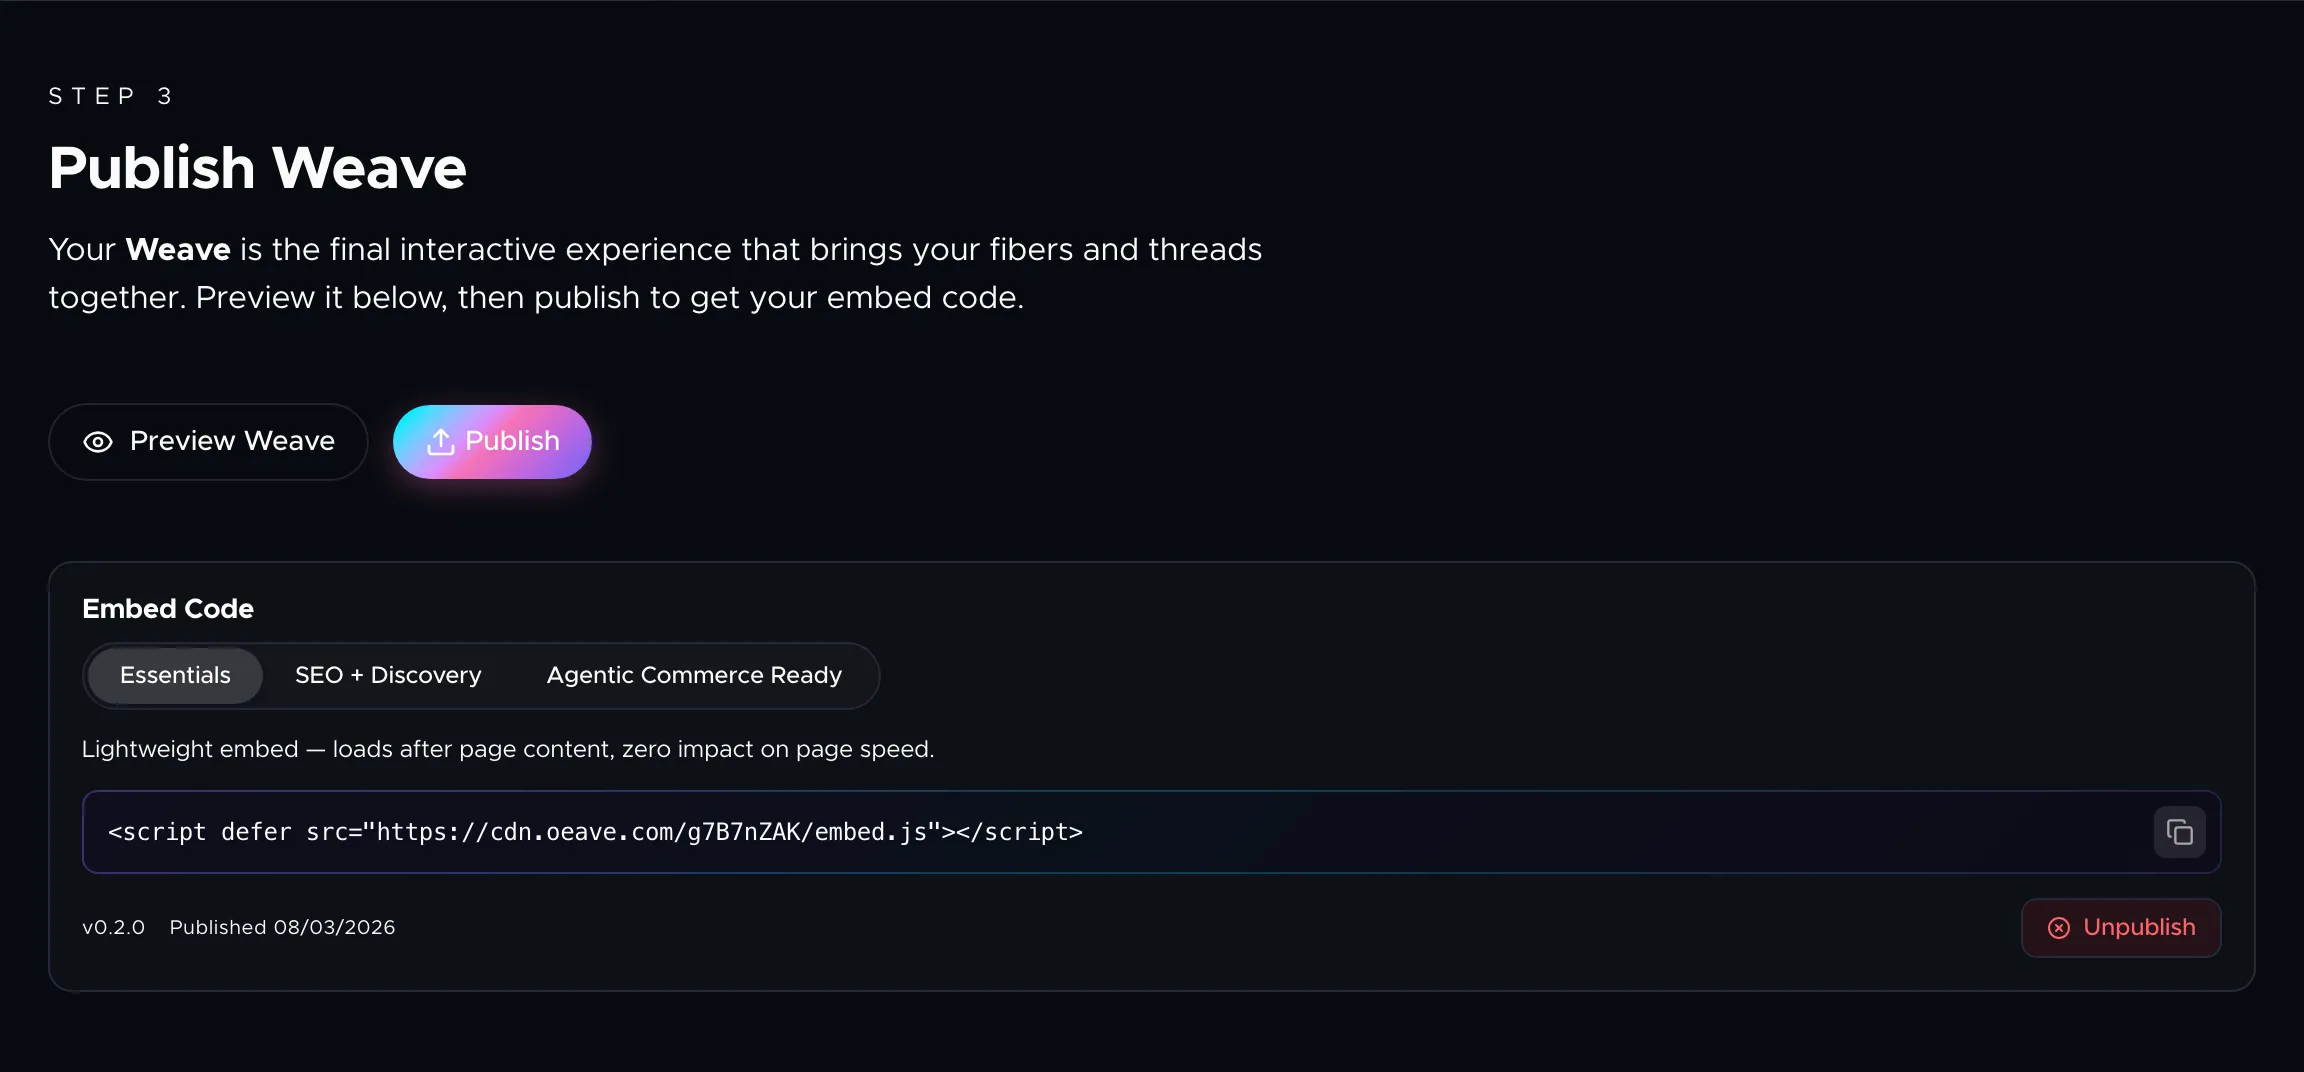
Switch to the Publish Weave tab. Click Preview Weave to see how your experience looks before going live — see Previewing Your Weave for details on the preview modes available. When you're ready, hit Publish.
After publishing, you'll get an embed snippet. Copy it into the <head> of your product page and your Weave is live. There are three embed tiers depending on your plan:
- Essentials — a single script tag that loads the interactive experience.
- SEO + Discovery — adds an llms.txt file, video sitemap, and JSON-LD so search engines and AI answer engines can discover your product with rich media.
- Agentic Commerce Ready — includes everything above plus preconnect hints, an MCP server, and AI search endpoints for autonomous shopping agents.
For full publishing and embedding instructions, see Publishing and Embedding. To understand how the different embed tiers optimize for AI discovery, see Answer Engine Optimization. To compare plans, see Plans and Pricing.
Next steps
With your first Weave published, you can refine it at any time. Add more fibers, rearrange threads, adjust your brand style, and republish — the embed code stays the same.
Here are some recommended next reads:
- Styling Your Weave — customize colors, fonts, logos, and layout.
- Presentation Modes — understand feed, video, and embed modes.
- Analytics and Insights — track how buyers interact with your Weave.
- AI Suggestions — let Oeave recommend improvements based on visitor behavior.
- Hotspot Scenes — add interactive 3D models and "choose your own adventure" flows.
- Account Settings — manage your profile, password, and billing.
- Project Settings — rename projects, manage API keys, or delete a project.